I consider it reasonable to bring process control in‑house: creating product photos without a photographer, where the entrepreneur or marketer organizes the shoot themselves, automates processing and connects 3D/AI where it speeds up publishing. Such an approach works for small and medium e‑commerce, D2C brands and marketplace sellers who need to scale photo production as SKUs grow and lower the cost per SKU. The practice of BUSINESS SITE confirms: the right pipeline reduces time-to-listing by 40–60% and stabilizes quality.
I recommend starting with a pilot. Allocate 50–100 SKUs, fix the success metrics: the impact of photo quality on CTR and conversion, cost per listing (CPL), average time to publication, the share of pages that pass moderation on the first try. The BUSINESS SITE team implemented dozens of such pilots for online stores and B2C brands, and in each case early focus on metrics accelerated payback.
How to take product photos without a photographer

Product photos on a smartphone: a quick start with minimal costs. The quality of modern cameras is sufficient for product cards and marketplaces with proper lighting, a white background, and basic retouching. Speed is excellent, scalability is moderate, because much depends on manual processes that should still be automated with presets and batch processing.
DIY lightbox and light cube solve the need for stable lighting and a white background for packshots. This disciplines framing and simplifies background removal for product photos at scale. Strengths: consistency and speed, especially for cosmetics, electronics, and accessories. Limitation: large or transparent objects require fine-tuning of reflections.
Turntable: 360° product capture and short clips. Suitable for gadgets, footwear, and items with important angles. Scalability is high with the right workflow and templates. It requires discipline during shooting and subsequent assembly.
Macro photography for small items (jewelry, cosmetics, parts) provides sharpness and texture. I use focus-stacking on a smartphone or camera to gather sharpness across the depth of field. Speed is lower, but it delivers the quality needed for content shots and zoom frames.
3D visualization and CGI, when control over reflections is needed, endless color variations, rendering alternative angles, or the physical sample is unavailable. PBR materials, HDRI environments, and virtual lighting provide a consistent result. Skills are important, but the ROI for large catalogs is very reasonable.
Photogrammetry, a quick way to get a 3D model from photos. Works well for 360° and AR widgets when textures are complex. Requires careful shooting and cleanup of the mesh/textures.
Neural network generation – creating product images using AI. It speeds up creating scenes, backgrounds, seasonal variations, and “lifelike” photos without a studio. Quality is improving, and commercial licenses are becoming clearer. I will analyze the capabilities and limitations in detail below.
For clothing and textiles I recommend a hybrid: product photos without a model using flatlay plus neural generation of contextual scenes and mannequin stand-ins. For electronics: lightbox, reflectors, and 3D renders for complex glossy surfaces. For cosmetics and pharma: light cube and packshot, complemented by 360° and macro for key textures and shades.
How to take product photos with a phone

We start with preparation. Any flagship from the last three years shoots RAW/DNG and can hold exposure in manual mode — this is key. A tripod stabilizes the image, and a small macro lens for the smartphone helps reveal the texture of small SKUs. I always allow time to clean the product surface, use gloves and microfiber — this saves hours of retouching dust.
Camera settings determine predictability. I fix ISO at the minimum, set shutter speed for constant light, and expose using a gray card. I set the white balance manually to maintain color consistency between shots. RAW gives freedom for tonal calibration, but for a production task you can shoot JPEG+RAW and automate corrections.
Shooting technique relies on simple rules. Composition for packshots: center the product’s center of mass in the frame, keep even geometry, and use the same distance and angle for all SKUs. For flatlay I use guide grids, paper or fabric with light texture, and small reflectors. For small items I shoot a series of frames with different focus points and assemble focus-stacking to get sharpness across the depth of field.
Templates and lighting for shooting on a phone
A lightbox solves 80% of tasks. Simple construction: diffusers made of matte plastic or fabric, two to three 5600K LED panels with CRI 95+, positioned above and to the sides. This creates soft, even light similar in characteristics to an HDRI environment, and makes it easy to get a white background for product photos with the correct exposure.
For soft shadows I raise the object on an acrylic pad and place a light source at an angle to preserve the product’s natural “grounding.” For glossy surfaces I use large soft sources and flags to control reflections. The “light stripe” technique along the body of electronics makes the shape readable and adds a premium feel without a studio.
Composition and framing for packshots
Cropping determines perception in thumbnails. I keep the product’s center of mass in the geometric center, leave 5–10% safe area at the edges, and follow the rule of thirds for additional elements. For previews it’s important to ensure the shape is readable at 180–240 pixels: I test reductions directly on the phone.
A consistent catalog requires templates. At BUSINESS SITE we created a set of cropping presets for the main storefronts: main product card, thumbnail, category, promo banner. Automatic center-of-mass cropping via scripts helps speed up the packshot workflow, and manual checking catches tricky cases.
Product photography without a studio

Methods for getting a clean background vary. I try to shoot as close to “pure white” as possible, then apply background removal without losing realistic shadows, preserving the contact shadow in layers and using the multiply blend mode. Such a workflow speeds up moderation on Rozetka and Prom.ua, where they often require a white background, no watermarks, and a clear resolution.
For marketplaces a minimal kit is enough: a light cube, two LED sources, a tripod, gray cards, and fabric diffusers. Such a kit fits in an office and covers 90% of tasks. In practice, for a travel services seller we photographed a range of travel accessories without an external studio, finished in two days, and published the product pages in the catalog with zero moderation returns.
Applications for shooting and background removal
Mobile apps handle basic post-processing. I use PhotoRoom, Pixelcut, Canva and Adobe Express, which can remove backgrounds, add shadows, and export in the required ratios directly on the phone. For streaming tasks this is a lifesaver when you need a shot “here and now” without access to a PC.
When batch processing it’s useful to preserve shadows and dimensions via masks and templates. This gives a consistent visual language to the catalog and eliminates “jumping” product sizes in the storefront, which is especially noticeable in the fashion category.
D-visualization and CGI as an alternative
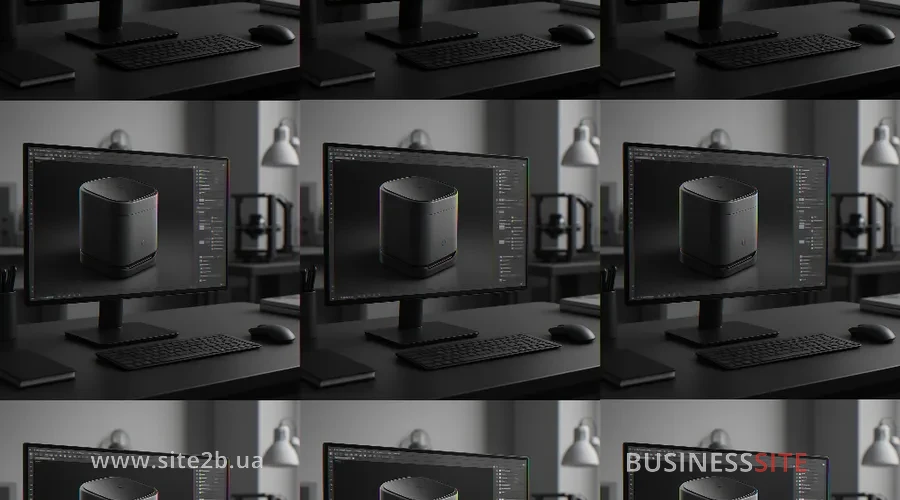
I choose 3D when color variability, complex optics, transparent materials and predictable reflections are required. PBR materials and texturing for renders allow achieving realism at the level of microrelief, and HDRI environments and virtual lighting consistently reproduce setups without a physical studio. For catalogs with dozens of shades this is ideal scalability.
NeRF and photorealistic 3D for products are already applicable to a number of categories. From a series of photographs we reconstruct volume and obtain interactive angles, which is useful for 360° product photography and AR. Photogrammetry for 3D product models speeds up the creation of base geometry, which we then refine with shaders and textures.
Generating product photos with neural networks

Stable Diffusion for generating product photos impresses with style control and the ability to fine-tune for a brand. DALL·E is convenient for commercial images thanks to its simplicity, composition quality, and transparent licensing. GAN-based approaches have historically been strong in photorealism, although today they are more often used as part of a pipeline. I use these tools as creativity accelerators and generators of backgrounds, scenes, and additional angles.
Neural network artifacts occur: distortions of logos, geometry, text and small details. I recommend a hybrid approach: shoot the base packshot and use AI for surroundings, shadows, reflections, and variant scenes. Retouching and combining with photos remove noise and enhance realism, and quality control filters out disputes during marketplace moderation.
Fine-tuning the model for the brand catalog
I collect a dataset of 50–200 reference images per category and 10–20 for background/scene style. Annotation includes frontal and angled shots, close-ups of details, and examples of correct shadowing. It is important to ensure a consistent color profile and target exposure for stable training.
When to mix photo and CGI/AI
Hybrid shooting: photo plus render — my favorite flexibility tool. I shoot the real product to stay accountable to the buyer, while I supplement the environment, reflections and complex materials with CGI. Batch generation of alternative angles and sizes brings the catalog to life, and image personalization based on customer data adds relevance in ads and email.
The pipeline looks like this: a quick packshot in a lightbox, reference shoots of reflections and textures, then rendering alternatives in 3D with color matching. For seasonal campaigns I add AI‑generated scenes and background templates, maintaining the brand style through fine‑tuning. This reduces the studio’s workload and speeds up A/B variants.
Post-processing and automation of retouching
Product photo retouching becomes a preset-based workflow. I prepare presets in Lightroom and Capture One: exposure, contrast, clarity for materials, saturation for cosmetics, tonal calibration for textiles. Capture One profiles for clothing provide more consistent color for cotton and wool, and separate settings for skin and metal, with precise highlights without clipping.
Automatic batch processing of images solves scaling. Batch processing in Photoshop/Lightroom runs cropping, alignment, adding shadows and exporting to target sizes. Scripts and cloud pipelines link steps from upload to CDN, reducing manual operations. I always add a quality check: sharpness verification, white level, presence of shadow and the SKU in the file name.
Scaling photo production
The workflow determines speed. I build the product photography workflow for marketing like an assembly line: product receiving, preprod, shooting by checklist, initial retouching, automation, approval, publishing and analytics. Creative approval processes (workflow approvals) through task systems reduce chaos and keep deadlines.
Automation of product photos is supported by integrations. APIs for background removal and replacement, cloud rendering, chatbots for processing photo orders and notifications in Telegram/Viber: this is real practice. Integration with PIM and CMS captures the data structure, and CDN and image storage ensure page load speed and versioning.
Image optimization for e-commerce
Technical optimization provides free traffic. I write alt tags and SEO for product photos including key attributes: model, color, material, category. I name files by SKU and keyword, add structured data schema.org image and Open Graph so that social previews of products form correctly.
Formats and compression: a balance of speed and quality. For storefronts I use WebP and AVIF, keeping JPEG for compatibility, and when necessary I test JPEG 2000. Proper resizing to the store grid and image compression without quality loss are important. Lazy loading and CDN help to meet Core Web Vitals, which affects visibility and conversion.
Legal and ethical requirements for photos
Commercial use of AI-generated images requires attention to licenses. DALL·E is available for commercial images provided the service terms are observed, while Stable Diffusion and other open models allow broad use when data rights and trademarks are properly respected. I formalize the policy: where AI is appropriate, how we label content, and what checks we perform before publication.
Marketplace requirements for product listings vary, but the pattern is the same: a white background, absence of extraneous elements and watermarks, minimum resolution, and strict conformity of the image to the actual product. Ethical and legal issues of AI content become part of the brand standard, especially when using hyperrealistic models and CGI.
Cost and ROI of photos without a photographer
Metrics ROI when automating photography include CPL, the payback period of the photo project, CTR and product page conversion, LTV and returns due to “color/expectation vs reality.” The impact of photo quality on CTR and conversion is measured by A/B tests on storefronts and ad campaigns. I add the metric time-to-live, the time from SKU arrival in the studio to publication on the site.
Comparison scenarios provide clarity. Manual shooting wins for small volumes and at the start; automation and batch generation of alternative angles win as SKUs grow; 3D/AI — for huge variability and complex materials. In BUSINESS SITE projects the payback of hybrid pipelines fell within 6–12 weeks, especially when the catalog was rapidly replenished and active advertising ran through Monobank/PrivatBank installments and Nova Poshta delivery.
Case studies, checklists and implementation plan
Case study: for the pharma category we replaced an external studio with lightbox+presets and generated backgrounds. Product page conversion increased by 18%, CPL decreased by 27%, and the launch of a new product line took 9 days instead of three weeks. In the electronics e‑shop, a hybrid with 3D visualization delivered a 22% increase in CTR in listings and reduced support inquiries about the product’s “gloss/matte” finish.
Checklist for the pilot is simple. Select 50–100 SKUs from a single category, prepare color and shadow references, set shoot and retouch presets, configure automatic batch image processing, set up integration with CMS/PIM and CDN. Create an A/B testing plan, a list of metrics and a weekly improvement cycle.
Frequently asked questions and short answers
Conclusion and call to action
The BUSINESS SITE team implemented similar pipelines for e‑commerce in pharma, laboratory services, fashion and electronics; our experience has shown that 8–12 weeks is enough to achieve measurable ROI and to tune content processes. I suggest a simple start: choose 50–100 SKUs, launch a pilot, test the visuals and look at the sales and CPL chart. I have prepared a pilot checklist with technical settings, templates and control points – request it, and I will help plan the pipeline for your CMS, PIM and marketplaces to reduce costs and speed up the launch of new product pages.
Rate the article: